Unleash Your Inner Dragon: Creating a Dragon Charcuterie Board
Charcuterie boards have come a long way from simple cheese and cracker trays. These days, they're edible works of art—and recently, Jeff showed me one of the most creative examples I've seen yet: a dragon made entirely of meats, cheeses, fruits, and snacks.
Naturally, my first thought was, "We need to make one of these."
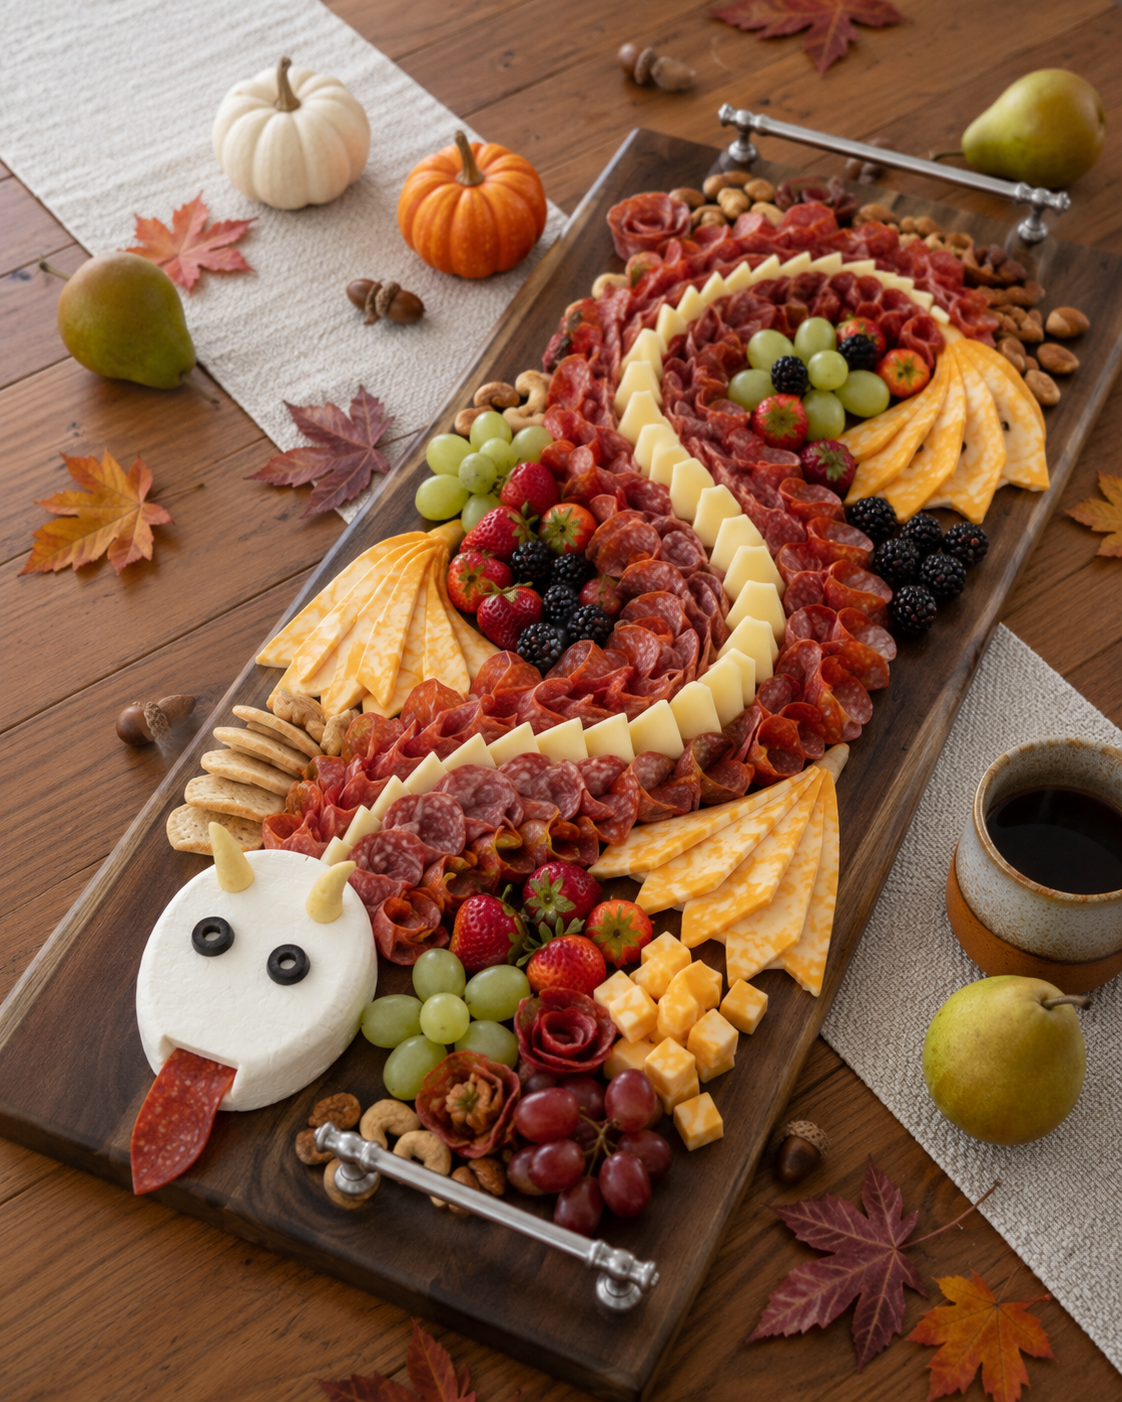
Imagine arriving at a party and being greeted by a dragon whose body twists across a handcrafted walnut serving board. The head is formed from a block of soft cheese, complete with olive eyes and a pepperoni tongue. Curved rows of salami create scales while berries, grapes, crackers, and colorful vegetables bring the dragon to life.
The best part? You don't need to be a professional food stylist to create one.

The Perfect Dragon Charcuterie
The internet is full of charcuterie dragons with carved cheese faces, sculpted nostrils, and intricate details that look like they belong in a fantasy movie.
Building Your Dragon
The beauty of this dragon board is that it can be as simple or as elaborate as you'd like. Ours starts with a wheel of Brie for the dragon's head and uses folded meats and cheeses to create the winding body.
Step 1: Create the Dragon's Head
Place a wheel of Brie near one end of your serving board.
For a simple dragon:
Use sliced black olives for eyes.
Add small cheese wedges or horn-shaped cheese pieces for horns.
Tuck a slice of pepperoni beneath the Brie for a dragon tongue.
That's it! Your dragon already has personality.
Step 2: Build the Body
Using folded salami or pepperoni slices, create a winding "S" shape that travels down the board.
Work in small sections:
Fold each slice in half.
Slightly overlap each piece.
Continue following the curve of the body.
This creates the appearance of scales while giving guests easy access to grab individual pieces.
Step 3: Add Dragon Spines
Place triangular slices of cheese along the outside curve of the body.
Alternating the direction slightly helps create the look of dragon spines running down its back.
Sharp cheddar, Colby Jack, Gouda, or Swiss all work well.
Step 4: Fill the Dragon's Belly
Now add color and texture inside the curves of the dragon:
Green grapes
Strawberries
Blackberries
Cubed cheeses
Nuts
Crackers
Think of these areas as little treasure hoards hidden beneath the dragon's coils.
Step 5: Finish with Wings
Fan slices of cheese near the body to suggest folded wings.
No complicated carving required.
The goal is to hint at a dragon shape while keeping everything easy to assemble and serve.
The goal isn't perfection.
The goal is creating something fun, delicious, and a little unexpected.
So if your dragon looks more like a friendly cheese monster than an ancient fire-breathing beast, don't worry.
Not All of Us Are Food Artists
The internet is full of charcuterie dragons with carved cheese faces, sculpted nostrils, and intricate details that look like they belong in a fantasy movie.
But here's a secret:
You don't need to be a food artist to make a memorable dragon board.
Our version starts with a simple wheel of Brie, olive eyes, a pepperoni tongue, and a winding body made from folded meats and cheese. It takes a fraction of the time while still getting plenty of smiles from guests.
The goal isn't perfection.
The goal is creating something fun, delicious, and a little unexpected.
So if your dragon looks more like a friendly cheese monster than an ancient fire-breathing beast, don't worry.
Once the party starts, nobody will care.
They'll be too busy eating it.
Whether you're hosting game night, a holiday gathering, or simply looking for a fun weekend project, a dragon charcuterie board is a memorable way to serve your favorite snacks. And if your dragon ends up looking a little goofy? Even better. Those are usually the ones everyone remembers.- Now go have fun making your dragon!