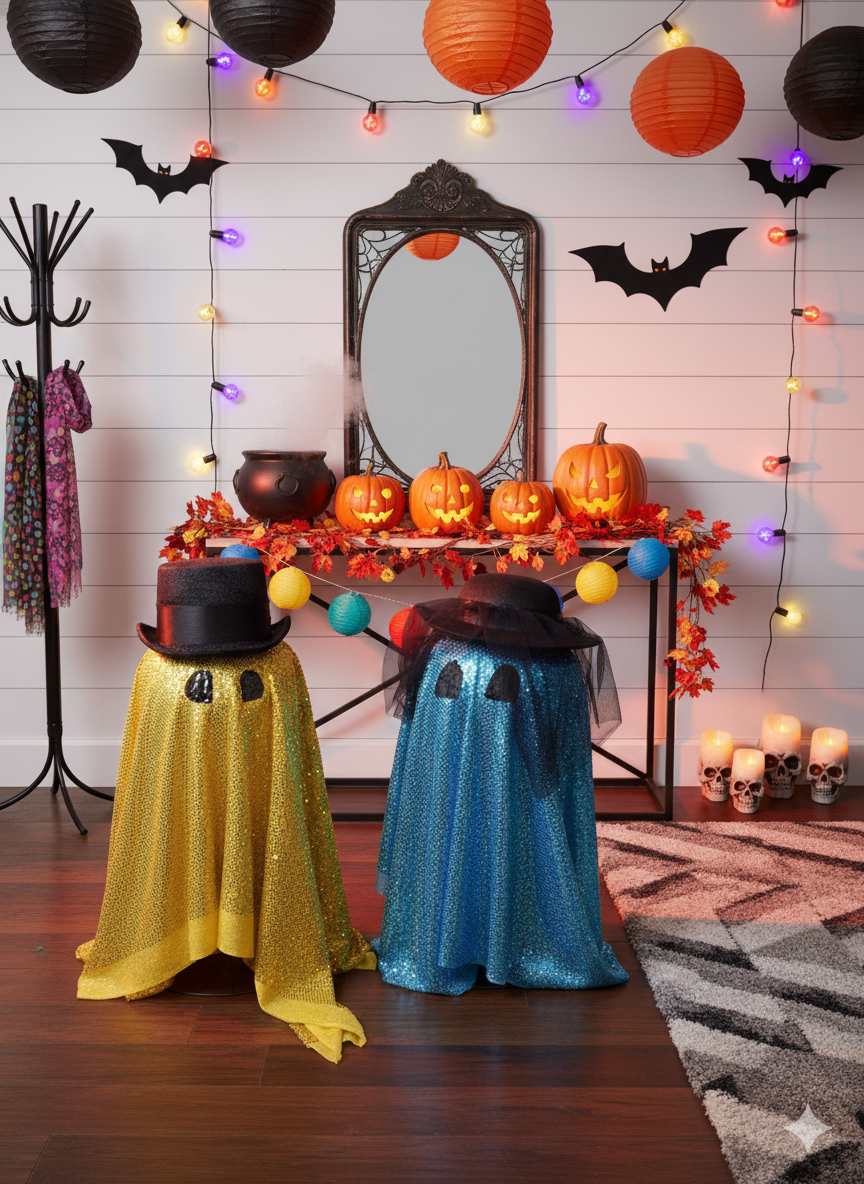
Last-Minute DIY Ghosts: 5-Minute Yard Ghosties
If you’ve got a few craft supplies, a dash of sparkle, and a last-minute need for Halloween décor — this is your sign. These adorable DIY ghosts come together in just minutes and can be customized with whatever fabric or accessories you have on hand. Whether you’re decorating your porch, your yard, or your workshop (hi, fellow late crafters), this project is pure Halloween joy.
🧵 Materials You’ll Need
Scissors
Hot glue gun
Black ribbon or tape (for the eyes)
1 yard of fabric — I used a disco glitter fabric for extra sparkle
4.7” x 9.6” craft foam half ball
Greening pins or hat pins
Tomato cage (I used a half tomato cage for shorter ghosts)
Optional: embellishments like hats, bows, or lights
👻 Let’s Make Some Ghosties
Step 1: Build the Base
Unwrap your foam half-ball and place it on the upside-down tomato cage — the stakes should face up. Gently press the foam onto the cage, but don’t push too far down; you want it secure, not pierced through.
Step 2: Drape the Fabric
Lay your chosen fabric over the foam head. I went with a bright disco-glitter fabric, but anything with a bit of shimmer or flow works beautifully. Secure the fabric with a few greening pins or hat pins at the top to keep it from flying away in the wind.
Step 3: Add the Eyes
Cut out two ovals from your black ribbon or tape and hot glue them in place. If you’re feeling extra crafty, paint them on for a smooth finish. I used black velvet ribbon — because, well, it felt fancy.
Step 4: Accessorize Your Ghost
This is where your ghost gets its personality. I used small hats I already had from the dollar store (because every ghost deserves a little flair). You can also add arms with wire and mini pool noodles before draping the fabric, or zip-tie some fairy lights to the frame for an ethereal glow.
Step 5: Display and Enjoy
Once your sparkly ghost friends are dressed and ready, find the perfect spot for them to shine — whether that’s a cozy corner inside, greeting guests from your porch, or nestled beside your pumpkins under the twinkle of Halloween lights.
🎃 Outdoor Display Tip
If your glittering ghost duo is headed outdoors (like mine), stake them down or add a small weight inside the tomato cage to keep them steady when the wind picks up. A good breeze can send them gliding off down the street — and while we don’t mind a bit of Halloween mischief, we’d rather not have our ghosties roaming the neighborhood… or do we?
✂️ Materials Recap
Before your ghosties take shape, here’s a quick checklist to make sure you have everything you need:
Tomato cage (the base for your ghost’s “body”)
Half foam ball (for the head)
Shimmering fabric (sequined mesh, tulle, or your favorite spooky texture)
Greening pins or floral pins (to secure fabric to the foam)
Hot glue gun & glue sticks
Scissors
Ribbon, hats, or other fun accessories for personality
Optional: small weights or stakes if your ghosts will live outdoors
✨ Finishing Touches
Once your ghostly pair is complete, fluff the fabric and adjust their “expressions” until they have just the right amount of charm. Add a top hat, veil, or ribbon bowtie to give each ghost its own personality — dapper, mysterious, or downright adorable.
A quick five-minute craft that turns your front yard into a friendly haunting ground — complete with sparkle, charm, and a dash of Halloween humor.


